The Golang Saga: A Coder’s Journey There and Back Again. Part 1: Leaving the Shire
The idea of learning Golang has been circulating in my head for quite some time. However, like many of us, I constantly found excuses to put it off. Just the other day, though, I was reading this compelling article that talked about how the key to effective learning lies in actually applying what we learn through side projects and making personal commitments along the way.
There was this one sentence that caught my attention immediately, and it felt like a sign: “making your goals and progress public can help keep you on track and encourage others to do so.” That’s when it became clear to me — I realized I needed a side project in the Go language, where I could openly share my progress with others during the development process.
Welcome to the beginning of a brand new adventure! I will be writing a series of technical articles detailing my journey of creating a side project from scratch using Go. It’ll be almost like watching a reality show, where you get to witness the project come to life step by step. Much like Bilbo, I have no idea what lies ahead, but I’m excited about the prospects.
But I won’t be doing this alone. No great adventure is completed single-handedly. That’s why I’ve got my companion, ChatGPT, right there with me and let’s not forget about the power of good old Google. Also your insights, feedback, and shared experiences will make this adventure even more enriching and enjoyable.

On the Doorstep
Without thinking twice, I invested 20 bucks in ChatGPT Plus and turned to a prompt: “Give me some ideas for a side project in the data engineering field that I can develop using Go.”
I had no interest in going for something common and overdone, like a to-do app or a web scraper. Additionally, it would be fantastic if the project could be related to the realm of data engineering, which is my area of expertise.
After a few tries, I finally got something that grabbed my attention.

So why it was interesting to me?
Any use of any API leads to HTTP requests, exception handling and JSON parsing. Additionally, it opens up possibilities for potential ETL/ELT processes, where you can extract, transform, and load the data into some database for your application. Moreover, you can create engaging and insightful visualizations from this data.
In general, the idea sounded like a great opportunity to explore the language from different angles. Following that, I asked ChatGPT a few times to get more details on how I could utilize the weather API, and it gave me another good suggestion.

Then I wrote “elaborate on “Climate Change Visualizer” and that’s what I got.
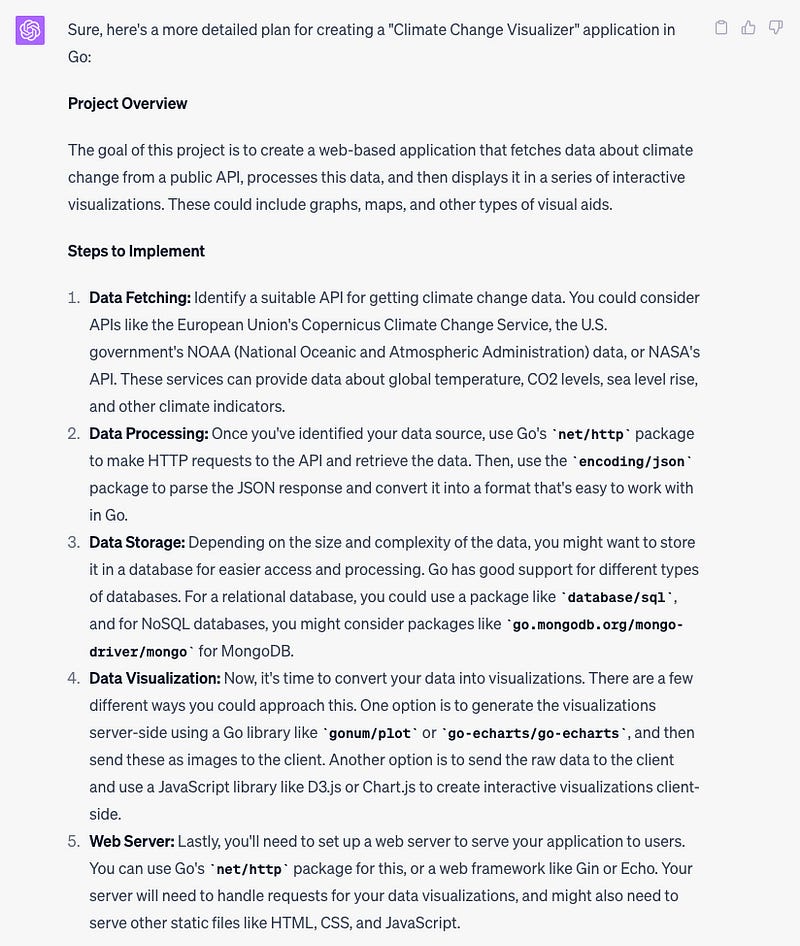
As you could see, I got a full plan for my future side project, and I was even advised on potential future improvements.

In the article I mentioned earlier, there was another really valuable piece of advice: “Think smaller. Instead of diving into a massive project that takes 50 hours to complete, try envisioning something you can build within 2–3 hours for your first attempt.”
So, in the first part of my saga, I’m going to take that advice to heart. I’ll be focusing on creating a local environment for a Go language project and developing my very first script. This script will fetch some data from a public weather API setting the groundwork for my upcoming project.
Talking about public weather API, I asked ChatGPT for some recommendations on the best API to use for accessing historical weather data for free.
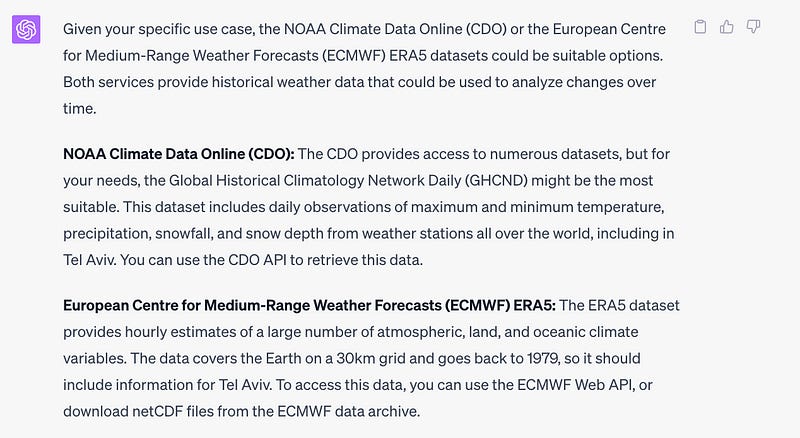
Since none of these APIs were familiar to me, I chose the first one. If it wasn’t good enough, I could change it any time during the development.
Preparing the Development Environment
Installing Go
To get started, I followed the instructions provided by the official Go website and installed it as a MacOS user and created a folder for Go workspace:
mkdir ~/goNext, I needed to specify the location of the Go workspace (GOPATH) and the directory where Go executables were installed (GOBIN) in my environment variables. I also added the Go binaries directory to the system's PATH variable to allow me to run Go commands and executables from the command line without specifying their full path.
I edited my zsh profile file located at “~/.zshrc”
vi ~/.zshrcexport GOPATH=$HOME/go
export GOBIN=$GOPATH/bin
export PATH=$PATH:$GOBINand reloaded the configuration file for the Zsh shell.
source ~/.zshrcAfter those changes, I could run Go commands from any terminal on my computer.

Creating a git repo
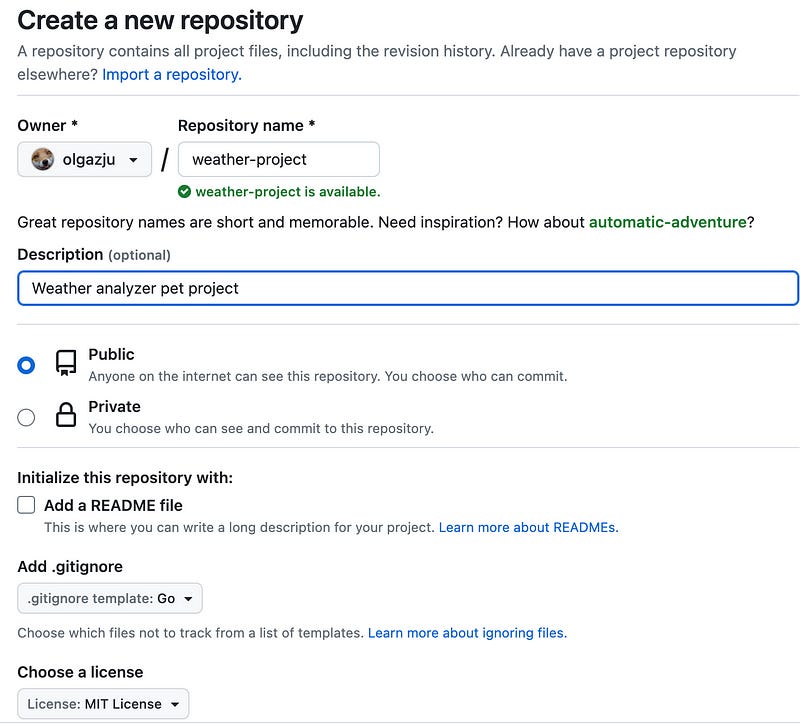
For my project, I obviously needed a public GitHub repository. I mean, who wouldn’t want the world to admire their brilliant ideas and clever code?
Therefore, I created a public repository named “weather-project” in my GitHub account, which you can see in the image below.
Then I copied the link and cloned this project on my computer.
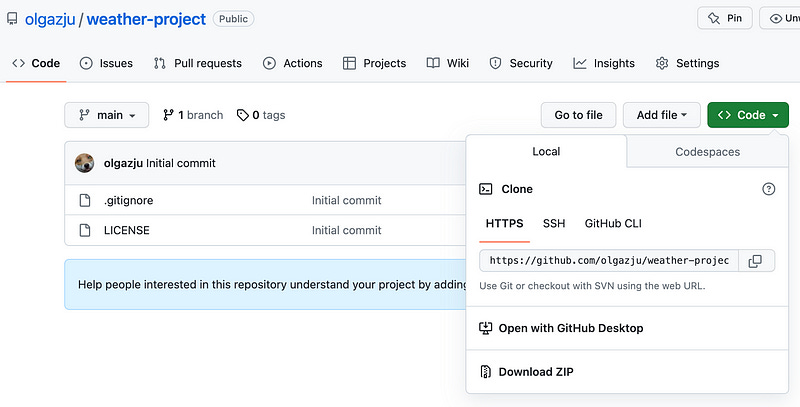
git clone https://github.com/olgazju/weather-project.git
I must confess that I enjoy using GitHub Desktop to manage my repositories. Even though true programmers prefer the command-line interface and have mastered it like true Git wizards, I don’t feel any shame in using GitHub Desktop. Its visual simplicity and user-friendly experience make the development process much more enjoyable and less challenging.
So, I added my weather-project folder as an existing repository in GitHub Desktop and created the api-cli-tool branch as my first step.
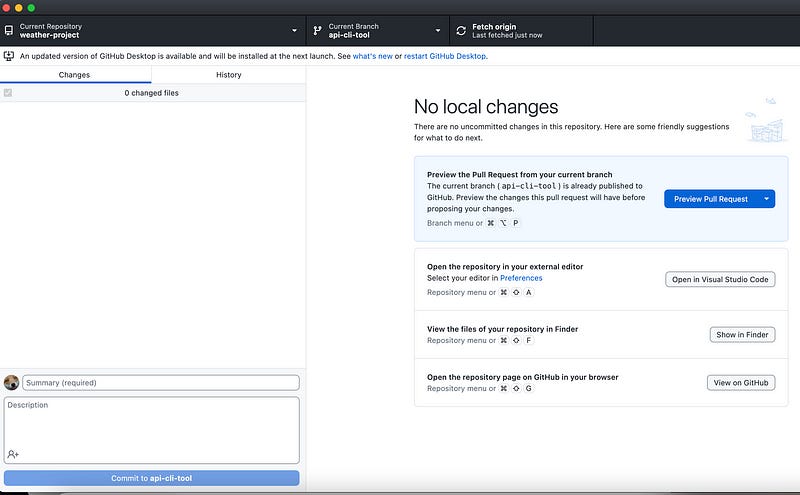
After completing this important step, I was all set and raring to go in creating my project.
Creating a Go project
I opened Getting Started Go tutorial and it said:
In actual development, the module path will typically be the repository location where your source code will be kept. For example, the module path might be github.com/mymodule.Alright, as suggested, I named my module ‘github.com/weather-project’ and proceeded to run the next command from the tutorial in my terminal inside weather-project folder.
go mod init github.com/weather-project
It was finally time to put it to the test and see if I could use VSCode with Go projects.
Preparing VSCode
Since I’m used to working with VSCode as my trusty IDE, it was essential for me to confirm its compatibility with Go and Go projects.
Before opening my weather-project folder in VSCode, I came across the Go extension for VSCode and installed it.
After that I discovered that a new file called go.mod was created for me when I ran the ‘go mod init’ command. As I read further, I learned that this file is meant to track the modules that provide those packages. It sounded quite logical, as it would help keep track of the dependencies and ensure a smooth management of the project.

I decided to test my setup and began with the classic ‘Hello, world!’ script. To be honest, I simply copy-pasted the ‘hello-world’ code from the tutorial and created a ‘hello.go’ file. It was a straightforward way to ensure that everything was working correctly and to get a feel for running a basic Go program.
package main

import "fmt"
func main() {
    fmt.Println("Hello, World!")
}
After that, I run the next command in VSCode terminal.
go run .
Wow, it worked!
I needed one more thing to make myself feel at home, something I usually use with Python. When working with data, I often turned to the Jupyter VSCode extension for its convenience. To my relief, I discovered that a Go kernel existed, tailored perfectly for my needs.
I ran the following command in the terminal, and then I restarted VSCode.
go install github.com/janpfeifer/gonb@latest && go install golang.org/x/tools/cmd/goimports@latest && go install golang.org/x/tools/gopls@latest && gonb --install
Finally, I created a new Jupyter notebook and was able to select the Go kernel in it.

Thus, I copied my ‘Hello, World!’ code into the first code cell of the Jupyter notebook and ran it. Everything looked good.
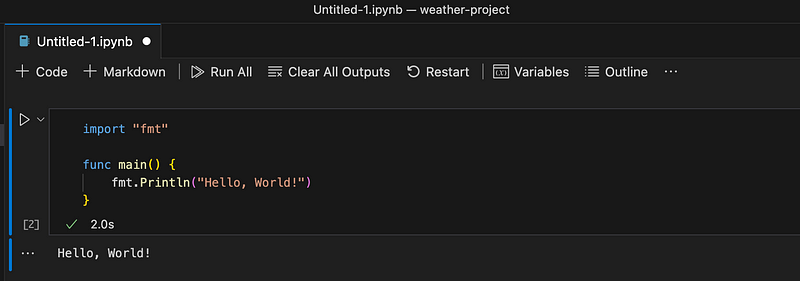
Now the moment had come to write my own code in Go.
As ChatGPT would say “I was ready to embrace the challenges and growth that lay ahead in the world of Go programming.” Really hate this overly enthusiastic AI thing. I’m simply writing in Go, I’m not eating a birthday cake here.
CDO API
I came across Getting Started for the CDO API that was recommended by ChatGPT:
Step 1: Request token
In order to access the CDO web services a token must first be obtained from the token request page.
I followed the instructions provided by the token request page above and successfully obtained my token via email. Thus, I was ready to proceed with implementing the CDO API into my Go project.
Another prompt to ChatGPT:
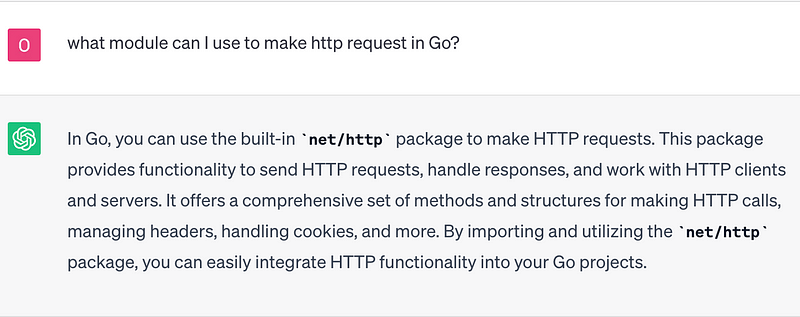
Sure, I could have relied on prompts in ChatGPT like ‘write an HTTP request in Go,’ but I preferred to take a more controlled approach. Sometimes, ChatGPT may not fully understand the context or provide accurate information. I also wanted to comprehend the code rather than blindly replicate it.
I found an example demonstrating the usage of the net/http package in GO documentation.
For control over HTTP client headers, redirect policy, and other settings, create a Client:
client := &http.Client{
CheckRedirect: redirectPolicyFunc,
}
req, err := http.NewRequest("GET", "http://example.com", nil)
// ...
req.Header.Add("If-None-Match", `W/"wyzzy"`)
resp, err := client.Do(req)
// ...
In the Endpoints section in Getting Started, I came across a comprehensive list of available API endpoints.
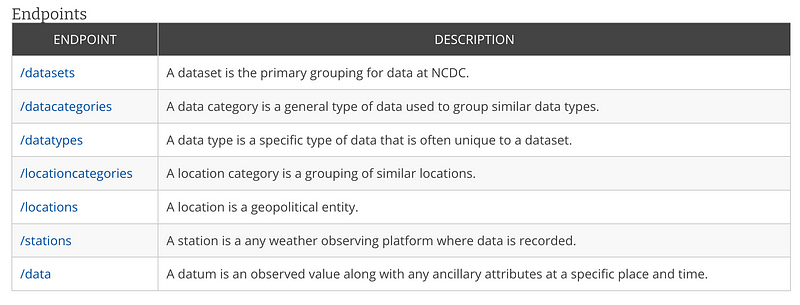
Thus, as my second step in this chapter, I decided to fetch all available datasets from the CDO API.
What I did in this script?
First of all, I didn’t create a client as it was suggested in the documentation, I simply used DefaultClient object from http module.
I used http.NewRequest to generate an http.Request value with request method “GET”, and the URL was set to datasets endpoint which is “https://www.ncdc.noaa.gov/cdo-web/api/v2/datasets", or handle the error if the value can’t be created.
As you can see, I sent created request using http.DefaultClient.Do with my token for authentication in the headers — req.Header.Set. Replace <MY_CDO_TOKEN> if you want to try this code with your actual token.
I got the response in the resp variable. The resp.Body was read using ioutil.ReadAll, and the response body data was stored in the body variable.
Finally, the response body was printed using fmt.Println(string(body)).
I saw that the response returned in the form of a JSON-formatted list of datasets in the results field. Although the response was quite large, I’ll share a snippet of it here to give you an idea:
{
   "metadata":{
      "resultset":{
         "offset":1,
         "count":11,
         "limit":25
      }
   },
   "results":[
      {
         "uid":"gov.noaa.ncdc:C00861",
         "mindate":"1763-01-01",
         "maxdate":"2023-06-05",
         "name":"Daily Summaries",
         "datacoverage":1,
         "id":"GHCND"
      },
...
]
I thought that I would like to make the JSON response more manageable and user-friendly. I guessed that I needed some kind of structure to match JSON response to it.
Prompted by my inquiry on how to map JSON to a variable, ChatGPT offered a suggestion involving json.Unmarshal. However, the example code it provided didn’t yield the desired results. I got the next error:
json: cannot unmarshal number 0.95 into Go struct field Dataset.results.datacoverage of type intThat was the perfect moment to dive into the documentation and explore the concepts of types in Go and how to perform JSON data unmarshaling.
So, by defining a struct with the appropriate fields that matched the result JSON structure, I could create a structured representation of the data. Using json.Unmarshal function, I was able to convert the JSON response into the corresponding Go struct.
Below, you can find an updated version of the code:
What I did in the code:
So I looked at JSON structure, where all fields were strings except ‘datacoverage’ which was actually float.
{
   "uid":"gov.noaa.ncdc:C00861",
   "mindate":"1763-01-01",
   "maxdate":"2023-06-05",
   "name":"Daily Summaries",
   "datacoverage":1,
   "id":"GHCND"
}
Then, I defined two struct types: Dataset and Datasets. The Dataset struct mirrored the results field of the JSON response, including the corresponding data types for each field. On the other hand, the Datasets struct served as a list of Dataset objects.
After that, I sent GET request the same way as it was done in the first script version and I used json.Unmarshal to match results field from body variable into the datasets variable. Then I used a loop to iterate over the Results field of the datasets variable and print the Name field of each dataset.
You can also observe the error handling mechanism: errors were handled by printing the error message and returning from the function.
As expected, I run my code and I got my list of datasets names as a result.
go run .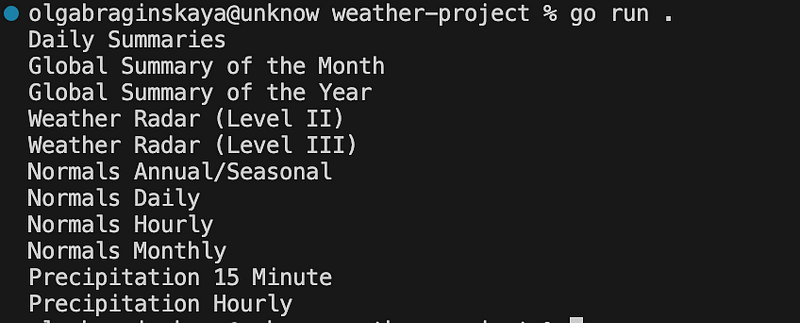
It seems that the “Daily Summaries” dataset could be a suitable candidate for our project’s needs.
Saving Achievements
After successfully creating my initial Go script that received a response from the CDO API, I decided it was time to push my changes to the repository and merge my branch.
Additionally, I made sure to exclude the .DS_Store file, which is a macOS-specific file, from version control using the .gitignore file. Carefully reviewing my changes, I pushed it to my branch.
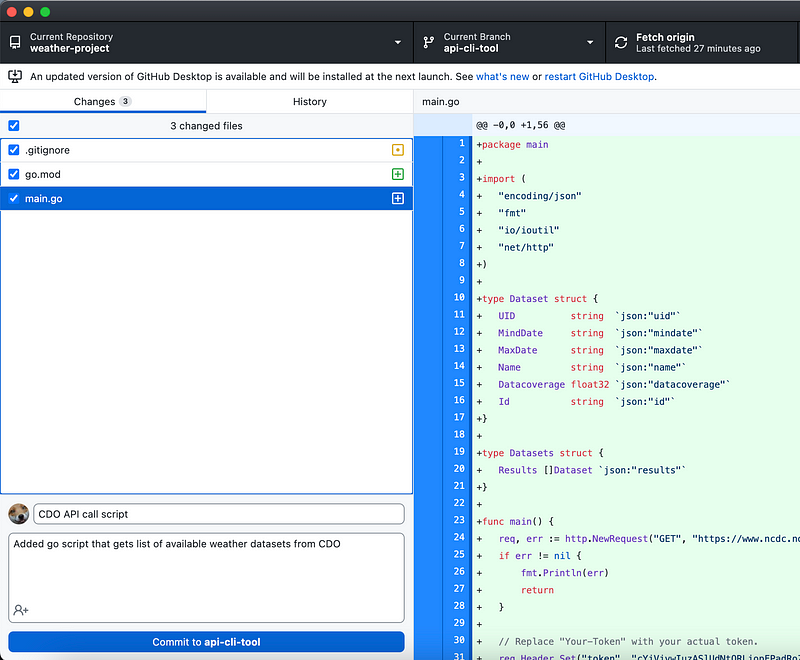
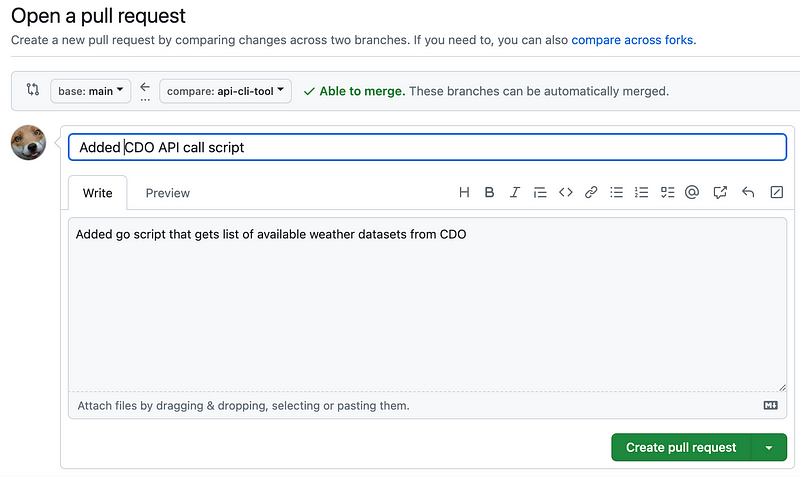
Then I opened a PR to main branch and merged it.
Conclusion
In this part, I have come across an interesting idea for my personal project as part of my journey to learn the Go language. I’ve successfully set up my local development environment, selected a weather API, and retrieved some data from it with the assistance of ChatGPT.
With these important steps completed, I am now prepared to move forward with my project. In the next part, I will focus on exploring and analyzing the data I have obtained from the API. Keep following this adventure to witness the progress I make in my Go journey.
Next articles:


